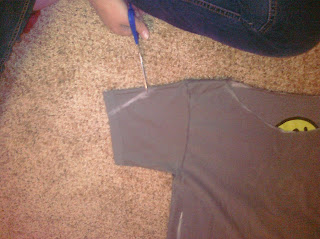
Cutting a Zumba Shirt

It is official, I have joined a Zumba class. I was encouraged from a couple friends to join with them and it is fun. But I had no idea what it was when they invited me. So I looked it up and found several videos on YouTube about the fitness craze, including several on the cut up t-shirt fashion. And since joining, I have had the continual urge to cut up a t-shirt.
Now I in no way consider myself a fashionista. I have clothes that I like and feel attractive in, but could careless about what is in style and what is walking down the runway in New York, London or Paris. But there is one thing that I think is the worst fashion choice that a woman can make, and that is of a crew neck t-shirt. Crew necks are the most unflattering and formless apparel that a woman can wear. But sure enough, our t-shirts for class are crew necks.
 |
| They are kidding right? This is supposed to look good? |
So I decided to cut up the shirt. But I did not want to follow the all the tutorials that I saw on YouTube, made by skinny, barely out of high school girls. They were cutting shirts back to barely a front, barely a back or both. Not only would I feel embarrassingly naked, I would feel, well....fat (not that I am particularly thin).
So I decided to make a tutorial of my own. And here we go.

Step 1
Start by putting the shirt on, looking in the mirror and determining where the shirt needs improvement.
Step 2
Turn the shirt inside out and lay it out on a flat surface. I used the floor, but any large, flat surface will work. Make sure the front of the shirt is on top. Using chalk, mark the areas to cut. For my shirt, I marked the sides to give to shirt more of a shape, the caller, and the sleeves. I also marked the hems on the bottom and sleeves.

Step 3
For this particular design, draw a mark 2-3 inches below the collar. Draw simular mark at the middle point of the shoulders. Use these mark as a reference to draw a half moon around the collar. At one of the marks on the shoulder, make a small snip into the fabric.

Making sure to only cut the top layer of fabric, cut out the half moon shape.

Draw a line from one of the shoulder marks to the other using the chalk.

Carefully cut along the new line, removing the crew neck collar.


 |
| RIP decapitated crew neck t-shirt |
Step 4
Now starting on one of the sleeves, make five cuts following the shape of a triangle.

Cut the hem off the sleeve.
 |
| The sleeve should look something like this. |
Pull each of the strips and tie together.
Step 5
Repeat all of step 4 on the other sleeve.
Step 6
Carefully straiten the hem at the bottom of the shirt. Make sure both the bottom and top hem line up.
Carefully cut the hem off.
Cut the hem into two piece and set a side.
Step 6
For the sides, I drew upside down triangles withe the widest part of the triangles five to six inches below the sleeves and the narrowest part of the triangle where the hem used to be. I did this so that when the shirt is cut, it will have more of a hour glass shape and not a box.
Make sixteen to eighteen cuts, following the triangle shape down the sides.
 | |
| The shirt should look something like this |
 |
| The side of the shirt should look like this. The cuts should be wide for people who are thinner. |
Carefully weave the stripes down through the cuts below each strip and tie it with the corresponding strip.
 |
| The ties should look something like this. |
Tie it off in a bow.
Repeat step 7 on the other side.
The End Result
The end result is not perfect, but it is the first shirt that I have ever cut up and I like it better than the old crew neck. As for the body, well it is getting better with doing Zumba


